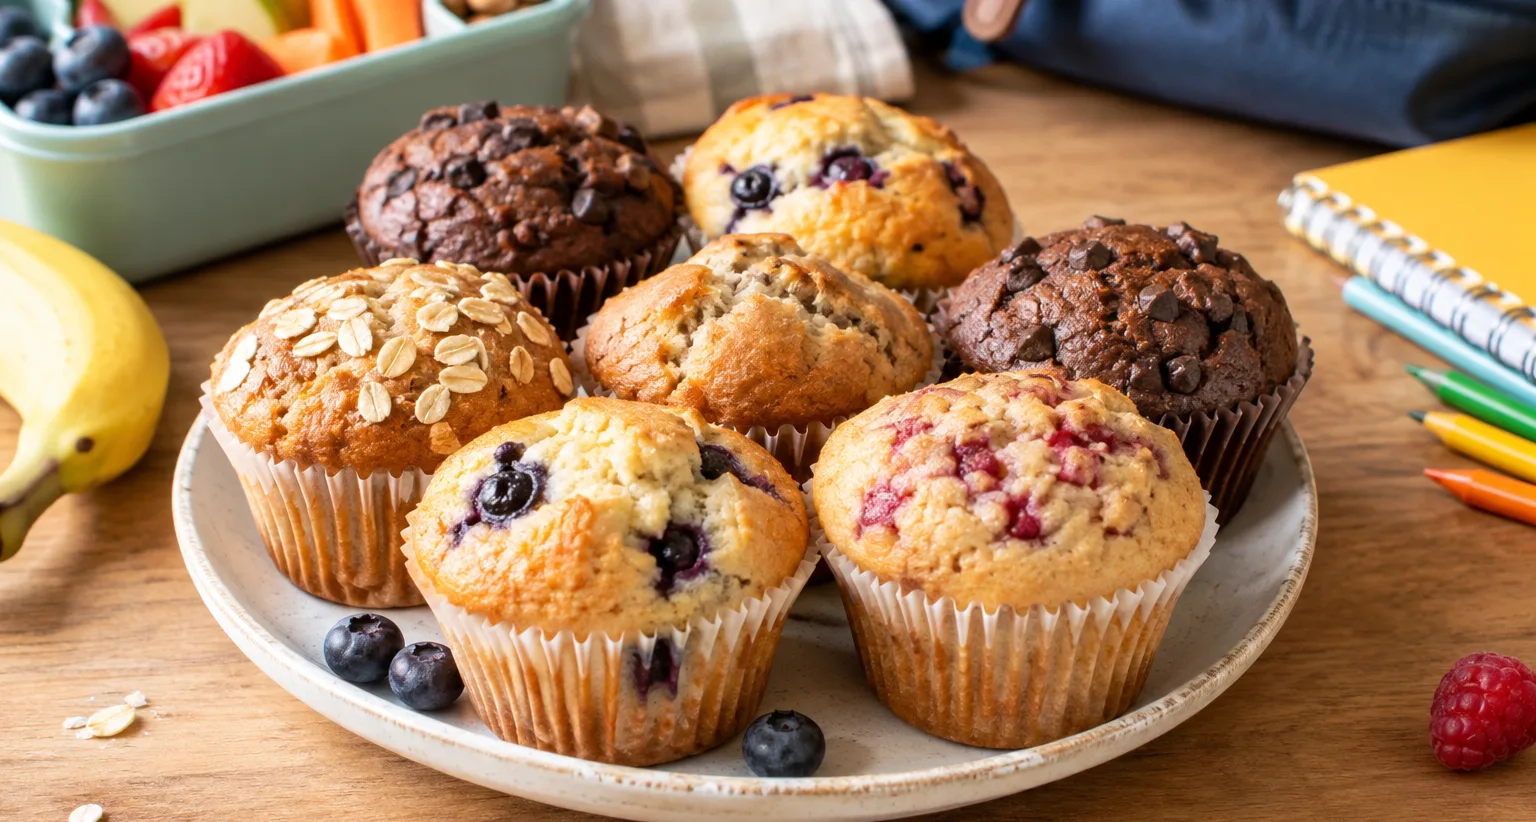
Some baked goods are best enjoyed warm, straight from the oven. Others are practically made for a school lunchbox. A good muffin shouldn’t fall apart in your hands, turn into a dry crumb by the next morning, leave half its filling at the bottom of the container, or suffer after spending a few hours in a backpack.
That’s exactly why muffins for school are one of the easiest homemade snack options. You can bake them in the evening, keep some for the next day, and freeze the rest. Even better, one basic batter can easily become several different flavors.
This collection includes 7 recipes, from banana and apple muffins to savory cheese muffins. Along with the recipes, I’ve included a few simple baking tricks that are especially useful when you’re making muffins for a school lunchbox.
What Makes a Good School Muffin?
Before choosing a recipe, it’s worth thinking about more than just flavor. For a lunchbox, texture, size, and how the muffin holds up after cooling are just as important.
The best school muffin:
- is small or medium-sized;
- is easy to hold;
- doesn’t require a knife or spoon;
- doesn’t contain a large amount of runny filling;
- isn’t covered with frosting that can melt;
- stays soft the next day;
- isn’t overly sweet, especially when served with fruit;
- freezes well.
A little secret: If you’re baking muffins for the next day, don’t overbake them. It’s better to take them out when a toothpick comes out with a few moist crumbs than to wait until it comes out completely dry.
1. Banana Muffins for School
These are one of the easiest options for kids. Ripe bananas add natural sweetness and help keep the muffins soft even after they cool.
Ingredients for 8 muffins
- 2 ripe bananas
- 1 egg
- 150 g all-purpose flour
- 50 ml milk
- 40 ml vegetable oil
- 1 tsp baking powder
- ½ tsp cinnamon, optional
- a pinch of salt
How to make them
- Mash the bananas with a fork until smooth.
- Add the egg, milk, and oil and whisk together.
- In a separate bowl, combine the flour, baking powder, salt, and cinnamon.
- Add the dry ingredients to the wet ingredients.
- Stir just until no dry flour remains.
- Divide the batter between muffin cups, filling them about two-thirds full.
- Bake at 180°C / 350°F for about 18–22 minutes.
What can you add?
You can add finely diced apple, a little rolled oats, or a few pieces of dark chocolate to the banana batter.
For school, I’d choose apple or oats: they make the muffins more filling and less dessert-like.
A useful trick
Don’t use greenish bananas. The best ones for this recipe have brown spots on the peel. They provide a much stronger banana flavor and allow you to reduce the amount of added sugar.
2. Apple Cinnamon Muffins
These muffins taste like homemade apple cake, but they’re much easier to pack than a slice of cake.
Ingredients for 8–10 muffins
- 1 large apple
- 2 eggs
- 50 g sugar
- 120 ml kefir
- 50 ml vegetable oil
- 180 g all-purpose flour
- 1 tsp baking powder
- 1 tsp cinnamon
- a pinch of salt
How to make them
- Peel the apple and grate it using the large holes of a box grater.
- If the apple is very juicy, gently squeeze out some of the excess juice.
- Beat the eggs with the sugar.
- Add the kefir and oil.
- Add the flour, baking powder, cinnamon, and salt.
- Fold in the grated apple.
- Mix gently with a spatula.
- Divide the batter between muffin cups.
- Bake at 180°C / 350°F for about 20 minutes.
Why is grated apple better than large chunks?
Large pieces of apple can release a lot of moisture inside the muffin. This can make the muffins take longer to bake and leave the center overly wet.
Grated apple distributes the moisture more evenly, resulting in muffins that are tender but not soggy.
3. Easy Carrot Muffins
Carrot muffins are a simple way to make homemade baking a little more interesting without frosting or lots of sweet additions.
Ingredients
- 150 g carrots
- 1 egg
- 100 ml kefir or plain yogurt
- 40 ml vegetable oil
- 40–50 g sugar
- 160 g all-purpose flour
- 1 tsp baking powder
- ½ tsp cinnamon
- a pinch of salt
How to make them
- Finely grate the carrots.
- Mix the egg with the sugar.
- Add the yogurt and oil.
- Stir in the grated carrots.
- Add the flour, baking powder, cinnamon, and salt.
- Mix until combined.
- Fill the muffin cups about two-thirds full.
- Bake at 180°C / 350°F for 20–23 minutes.
Why they work well in a lunchbox
Carrots help muffins stay soft for longer. However, don’t add too much: if the batter contains too much moisture, the center can become heavy and underbaked.
4. Banana Oat Muffins
If your child isn’t a big fan of oatmeal, turning it into a muffin can be a completely different experience.
Ingredients for 8 muffins
- 2 bananas
- 1 egg
- 100 g rolled oats
- 70 g all-purpose flour
- 100 g plain yogurt
- 30 ml vegetable oil
- 1 tsp baking powder
- cinnamon, to taste
How to make them
- Mash the bananas well.
- Add the egg, yogurt, and oil.
- Stir in the oats.
- Add the flour, baking powder, and cinnamon.
- Let the batter rest for 5–7 minutes.
- Divide it between muffin cups.
- Bake at 180°C / 350°F for about 20–25 minutes.
Why let the batter rest?
The oats need a little time to absorb the moisture. If you put the batter straight into the oven, the finished muffins may have an uneven texture.
Five minutes may seem insignificant, but it really does make a difference in this recipe.
5. Savory Cheese Muffins
Here’s an option for the days when you want something in the lunchbox that doesn’t feel like dessert.
Ingredients
- 150 g cottage cheese
- 2 eggs
- 80 g plain yogurt
- 130 g all-purpose flour
- 1 tsp baking powder
- 50 g hard cheese
- a pinch of salt
- fresh herbs, optional
How to make them
- Mash the cottage cheese with a fork.
- Add the eggs and yogurt.
- Grate the hard cheese.
- Stir it into the cottage cheese mixture.
- Add the flour, baking powder, and a little salt.
- Add dill or parsley if desired.
- Divide the batter between muffin cups.
- Bake at 180°C / 350°F for about 20–25 minutes.
What to pack with them
These muffins pair well with:
- cucumber;
- sweet bell pepper;
- cherry tomatoes;
- apple slices;
- plain yogurt.
Instead of a sweet snack, you get a small, balanced lunchbox-style meal.
6. Chocolate Banana Muffins
Sometimes the best strategy isn’t to ban sweet foods, but to make them homemade and keep the ingredients simple.
Ingredients
- 2 ripe bananas
- 1 egg
- 100 ml kefir
- 40 ml vegetable oil
- 140 g all-purpose flour
- 20 g unsweetened cocoa powder
- 1 tsp baking powder
- 30–40 g sugar
- a pinch of salt
How to make them
- Mash the bananas.
- Add the egg, kefir, and oil.
- In a separate bowl, combine the flour, cocoa powder, baking powder, salt, and sugar.
- Combine the wet and dry ingredients.
- Mix just until combined; don’t overmix.
- Divide the batter between muffin cups.
- Bake at 180°C / 350°F for 18–22 minutes.
A little secret about chocolate muffin batter
Cocoa absorbs more moisture than regular flour, so chocolate muffins are especially easy to overbake.
If you’re making them for the next day, don’t leave them in the oven “for another five minutes just to be safe.” Those extra minutes can be the difference between a soft muffin and a dry chocolate cake-like crumb the next morning.
7. Berry Muffins
Frozen berries make these muffins possible even when fresh berries aren’t in season.
Ingredients
- 1 egg
- 120 g plain yogurt
- 50 g sugar
- 50 ml vegetable oil
- 180 g all-purpose flour
- 1 tsp baking powder
- 100–120 g berries
- a pinch of salt
Blueberries, blackberries, raspberries, currants, or a mixture of berries all work well.
How to make them
- Mix the egg with the sugar.
- Add the yogurt and oil.
- Stir in the flour, baking powder, and salt.
- Gently fold in the berries at the end.
- Divide the batter between muffin cups.
- Bake at 180°C / 350°F for about 20–23 minutes.
If you’re using frozen berries
There’s no need to thaw them completely.
Add the berries straight from the freezer. Otherwise, they can release too much juice and turn the batter purple or watery.
When using raspberries, don’t mix the batter for too long. Just a few gentle folds with a spatula are enough.
How to Keep Muffins from Drying Out Overnight
This is probably one of the most important parts of the whole collection.
Even a great recipe can be ruined by improper storage.
1. Don’t put hot muffins in a container
After baking, let the muffins cool in the pan for about 5 minutes, then transfer them to a wire rack.
If you seal hot muffins in a container, condensation will build up inside. The tops can become damp and the paper liners may become soggy.
2. Don’t leave them uncovered all night
Once the muffins have cooled completely, transfer them to an airtight container.
3. Don’t store all the flavors together
Chocolate, berry, and savory cheese muffins are better stored separately. Their flavors can easily transfer to one another.
4. Don’t refrigerate warm muffins
For ordinary homemade muffins, the refrigerator is often not the best place to store them because cold temperatures can make baked goods seem dry faster.
If the recipe doesn’t contain a perishable filling or frosting, muffins intended for the next day are best kept in a sealed container at room temperature.
Which Muffins Can Be Frozen?
Pretty much all seven recipes can be frozen.
This is especially convenient at the beginning of the school week.
Bake a large batch, let the muffins cool completely, then wrap them individually or place them in a freezer bag.
In the evening, simply take out the number you need.
They can thaw naturally overnight.
Which Muffins Freeze Best?
These tend to freeze especially well:
banana → apple → carrot → oat → chocolate.
Berry muffins can also be frozen, although their texture may be slightly softer after thawing.
Savory cheese muffins are best eaten fresh or stored for a shorter period because cottage cheese can change texture slightly after freezing.
How Many Muffins Should You Pack for School?
There is no universal amount that works for every child. It depends on age, appetite, how long the school day is, and what else is packed in the lunchbox.
A useful rule is that a muffin doesn’t have to be the entire snack.
For example:
Sweet option
- 1 muffin;
- an apple or pear;
- plain yogurt.
Berry option
- 1 berry muffin;
- a banana;
- water.
Savory option
- 1–2 cheese muffins;
- cucumber;
- sweet bell pepper;
- fruit.
This gives your child a variety of foods while keeping the muffin as one part of the snack rather than the entire meal.
How to Make One Batter into Seven Different Flavors
Here’s another trick that can save a lot of time.
You don’t have to make seven different muffin batters every Sunday.
Instead, prepare one neutral base, then divide it into several portions.
Add apple and cinnamon to one.
Banana to another.
Berries to a third.
Cocoa to a fourth.
Carrot to a fifth.
With one batch of batter, you can create a small variety of muffins.
This is especially useful if you have several children in the family and everyone has a different favorite flavor.
Why Do Muffins Sometimes Stick to the Paper Liners?
Here’s a common problem: the muffins rise beautifully, but half the muffin stays stuck to the paper.
The problem isn’t necessarily the recipe.
If the muffins are still warm, the paper may not peel away easily. Let them cool completely first.
Very moist recipes — especially those containing lots of banana or apple — naturally have more contact with the paper.
For school baking, good-quality sturdy liners or silicone muffin cups can make things easier.
What Not to Add to School Muffins
This isn’t just about baking. Practicality matters too.
Not every delicious ingredient is convenient for school.
Be careful with:
- large amounts of frosting;
- very sticky caramel;
- runny fillings;
- excessive chocolate glaze;
- large pieces of fruit;
- crumbly toppings.
These additions may be wonderful for a muffin served at home, but they can be messy and inconvenient inside a backpack.
Also, before using nuts or other potential allergens, make sure you follow the rules of your child’s school and classroom.
A Simple Weekly Baking Plan
You don’t need to bake every morning to have homemade snacks ready.
Sunday
Bake 12–16 muffins in two flavors.
After they cool
- keep some for Monday;
- freeze the rest.
Tuesday
Take the frozen muffins out for Wednesday.
Wednesday
Bake a small fresh batch.
Thursday–Friday
Use the remaining frozen muffins.
This way, homemade baking doesn’t turn into a several-hour daily task.
7 Recipes — 7 Different School-Day Flavors
If you’d like to rotate the flavors, here’s a simple schedule:
| Day | Muffins |
|---|---|
| Monday | Banana |
| Tuesday | Apple Cinnamon |
| Wednesday | Chocolate Banana |
| Thursday | Cheese |
| Friday | Berry |
| Next Monday | Carrot |
| Tuesday | Banana Oat |
This keeps things interesting for your child without requiring you to come up with a completely new snack every day.
The Secret to Great School Muffins
The best school muffin isn’t necessarily the one with the most chocolate, sugar, or filling.
It should be easy to eat, soft, simple enough to pack, and something your child actually wants to eat.
Even more importantly, it should fit into your real morning routine.
If a recipe requires an hour of preparation, ten complicated ingredients, and cream decoration, it’s unlikely to become a regular family favorite.
But if you can mix the batter in 10 minutes, put the pan in the oven, and transfer the finished muffins to a container in the evening — that’s a true weekday recipe.
So instead of looking for one “perfect” muffin, it’s better to have several reliable options: banana for softness, apple for that homemade comfort-food flavor, carrot for variety, oat for a more filling snack, cheese for a savory lunchbox option, chocolate for a little treat, and berry for berry season.
And even better — bake a double batch and freeze some.
That way, homemade muffins for school stop being another morning task and become a small stash of ready-to-go snacks for the week.